Why Draughts Cost So Much: The Hidden Drain on Your UK Energy Bill
As we navigate the complexities of the UK's energy landscape into 2026, with the Ofgem price cap dictating much of our energy tariffs, every kilowatt-hour (kWh) saved translates directly into palpable financial relief. It’s not just about turning down the thermostat – it’s about ensuring the heat you’re paying for stays in your home. A typical pre-2000 UK home, unfortunately, is a sieve for warmth. We're not talking about just a slight breeze; extensive studies and government reports (such as those by the Energy Saving Trust) consistently show that these older properties can lose a staggering 15–20% of their generated heat directly through unwanted gaps and cracks. That heat, quite literally, is money escaping into the chilly British air.
Consider the current (or projected) energy prices. While figures fluctuate, for the purposes of this guide in 2026, let's work with an illustrative average gas unit rate of approximately 7-8p per kWh and a standing charge of around 30p per day. If your annual gas bill for heating is £1,500, losing even 15% means £225 is simply vanishing. The beauty of draught-proofing is its unparalleled return on investment: for an average material cost of under £40, you could easily save approximately £180 per year on your heating bill. This isn't just a saving; it's an annual dividend on a minimal one-off investment.
Current Supplier Watch
The 7 Worst Culprits (and Comprehensive Fixes)
Identifying and addressing draughts requires a systematic approach. Here's a detailed breakdown of the most common offenders in UK homes, along with practical, step-by-step solutions and indicative costs based on readily available materials from DIY stores like B&Q, Screwfix, or even local hardware shops.
1. Letterbox: The Gateway to Cold Air
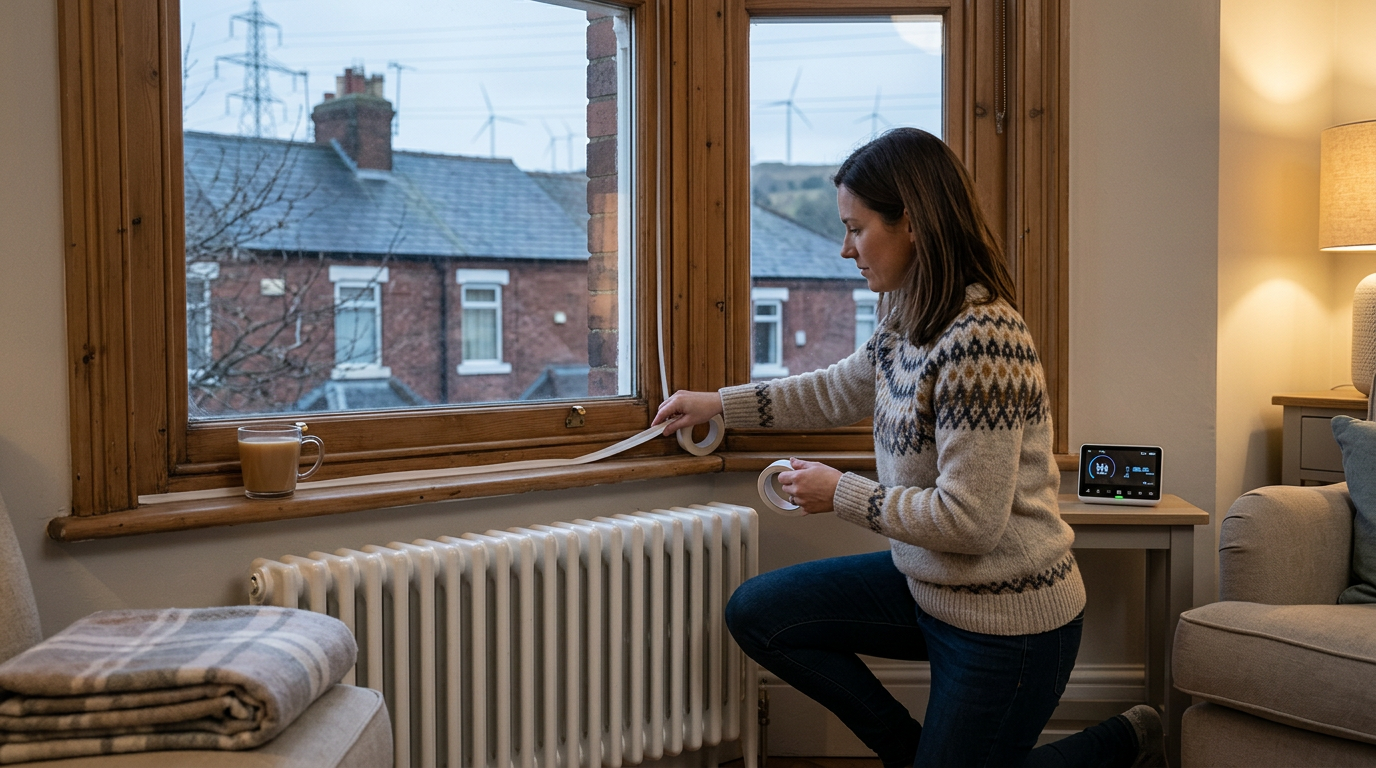
* The Problem: An unsealed letterbox acts like a mini-wind tunnel, channelling cold air directly into your hallway, especially noticeable in period properties with large, ornate letter plates. * The Fix: A brush seal (costing around £6-£10) is the simplest and most effective solution. These come in various sizes to fit standard letterboxes. * Step-by-step: 1. Measure the internal dimensions of your existing letter plate opening. 2. Purchase a brush seal designed to fit these dimensions. Many are self-adhesive or come with screw fasteners. 3. Clean the surface around the letterbox opening thoroughly with a damp cloth and allow it to dry. 4. Peel off the backing if self-adhesive, or mark screw holes. 5. Carefully align and press the brush seal firmly into place, ensuring the brushes face inwards to create a barrier. If screwing, pre-drill pilot holes. * Regional Note: Particularly impactful in colder, windier regions like the Scottish Highlands or exposed coastal areas of the South West, where prevailing winds can exacerbate this issue.
2. Front & Back Doors: The Grand Entrances for Draughts
* The Problem: Gaps around door frames, under the door, and through keyholes allow significant heat loss. This is especially prevalent in older terraced or semi-detached homes. * The Fix: A combination of self-adhesive foam strips (£5-£8 for a roll) for the frame, a door snake (£5-£10) or brush/fin-style draught excluder for the bottom gap, and a keyhole cover (£2-£5). Total estimated cost: £12-£20. * Step-by-step (Foam Strip): 1. Clean the door frame thoroughly where the door meets the frame when closed. 2. Measure the length of the top and sides of the frame. 3. Cut the foam strip to size. 4. Peel off the backing and carefully apply the strip along the frame, ensuring it compresses slightly when the door is closed, but doesn't hinder latching. * Step-by-step (Bottom Seal): 1. Measure the width of your door. 2. For a door snake: simply place it against the bottom of the door on the inside. 3. For a brush or fin seal: these typically screw to the bottom of the door. Ensure it’s positioned to lightly brush the threshold when the door is closed. Adjust height if necessary to avoid impeding opening/closing. * Step-by-step (Keyhole Cover): 1. Simple rotating or sliding covers can be screwed over the keyhole.
3. Loft Hatch: The Ceiling Culprit
* The Problem: An unsealed or uninsulated loft hatch is a direct conduit for warm air to escape into the cold loft space, bypassing your ceiling insulation. Many homes have ill-fitting or basic plywood hatches. * The Fix: Foam tape (weatherstripping) around the hatch opening and an insulated panel (£15-£25 for pre-cut kits, or DIY with rigid insulation board). * Step-by-step: 1. Measure the perimeter of the loft hatch opening in the ceiling. 2. Apply self-adhesive foam tape (medium-density is best) all around this perimeter. 3. If your existing hatch is just a piece of plywood, cut a piece of rigid insulation board (e.g., Kingspan or Celotex) to fit snugly on top of the hatch in the loft, or glue it to the top surface of the hatch itself. Ensure it doesn't prevent the hatch from closing. 4. For maximum effect, ensure the hatch sits tightly on the foam tape when closed. Add additional latching mechanisms if needed.
4. Suspended Floors: Draughts from Below
* The Problem: Gaps between skirting boards and uneven floorboards in older homes with suspended timber floors allow cold air from the ventilated void beneath to rise into living areas. * The Fix: Silicone or acrylic sealant around skirting boards and gap fillers for floorboards. Estimated cost: £8-£20. * Step-by-step (Skirting Boards): 1. Identify gaps between the skirting board and the floor, or between the skirting board and the wall. 2. Clean the area thoroughly. 3. Using a sealant gun, apply a continuous bead of flexible decorators caulk (acrylic sealant) or silicone sealant along the gap. Smooth with a wet finger or tooling tool. This is paintable if using acrylic caulk. * Step-by-step (Floorboards - if not carpeting): 1. For visible gaps between floorboards, consider specific floorboard filler products or thin strips of wood. If the floor is to be carpeted, a good underlay and fitting will largely mitigate this, but sealing with sealant or specialist gap-filling strips before carpeting is ideal for maximum effect.
5. Chimney (Unused): The Vertical Wind Tunnel
* The Problem: An open, unused chimney acts as a large, uninsulated flue, drawing warm air out of the room. * The Fix: A chimney balloon or chimney sheep (£20-£35). * Step-by-step: 1. Ensure the chimney is clean and free of debris. 2. Inflate the chimney balloon (using a pump) inside the chimney flue just above the fireplace opening. Ensure it's securely wedged, but not overinflated to avoid damaging the flue. 3. Leave the inflation tube hanging down as a visible reminder that it's in place. 4. For a chimney sheep, simply push it up into the flue until it's snug. * Crucial Safety Note: Only draught-proof unused chimneys. Permanently blocking an active flue is extremely dangerous due to carbon monoxide poisoning risk. If you might use the fireplace, ensure the balloon can be easily removed.
6. Window Frames: The Persistent Trickle
The Problem: Gaps around the opening sashes of older UPVC or wooden windows, or between the window frame and the wall. This is distinct* from trickle vents. * The Fix: Self-adhesive foam strips for opening sashes and a bead of exterior-grade silicone sealant for frame-to-wall gaps. Estimated cost: £6-£15. * Step-by-step (Opening Sashes): 1. Clean the contact surfaces of the window frame and sash. 2. Apply self-adhesive foam strips (thinner than door strips) along the perimeter of the opening sash where it meets the frame when closed. * Step-by-step (Frame-to-Wall): 1. Ensure the wall and window frame are clean and dry. 2. Using a sealant gun, apply a continuous bead of exterior-grade silicone sealant (UV and weather resistant) along the gap between the window frame and the external wall. Smooth with a wet finger or tooling tool.
7. Pipe and Cable Holes: The Tiny, Invisible Leaks
* The Problem: Small holes where pipes (e.g., boiler flues, waste pipes) or cables (e.g., internet, aerial) pass through external walls. Each can let in a surprising amount of cold air. * The Fix: Expanding foam or flexible filler (£4-£10). * Step-by-step: 1. Identify any holes around external pipes, cables, or even under sinks where waste pipes penetrate the wall. 2. For larger gaps, use expanding foam (wear gloves and protect surrounding surfaces). 3. For smaller gaps, use a flexible exterior caulk or filler. Apply directly into the gap and smooth. * Careful Application: Expanding foam expands significantly. Use sparingly and trim excess once dry.
What NOT to Seal: Critical Ventilation Points
While the urge to seal every crack might be strong, some airflow is vital for the health of your home and its occupants. Sealing these can lead to serious issues, from damp and mould to carbon monoxide poisoning:
- Trickle vents in windows: These are specifically designed to provide a small, continuous amount of background ventilation, crucial for preventing condensation and maintaining air quality without excessive heat loss. Do not block them.
- Underfloor airbricks: Found on the exterior base of older properties with suspended timber floors, these are essential for ventilating the void beneath the floorboards. Blocking them can lead to damp, dry rot, and timber degradation.
- Extractor fans / Cooker hoods: These remove moisture and odours from bathrooms and kitchens. Blocking them will lead to condensation, mould growth, and poor indoor air quality.
- Boiler room vents/Air supply for appliances: Any room containing a gas boiler, fire, or other combustion appliance requires a specific air supply vent. Blocking this is extremely dangerous as it can lead to inefficient combustion and the build-up of poisonous carbon monoxide. Always consult a Gas Safe engineer before altering ventilation related to gas appliances.
The Quick Test: Unmasking Hidden Draughts
The incense stick test is a simple, low-tech way to pinpoint draughts you might not feel.
- Choose a windy day to maximise air movement.
- Light an incense stick (or a thin candle, carefully) and allow it to produce smoke.
- Slowly walk around your home, holding the incense stick near potential draught spots:
- If the smoke wavers, dances, or is drawn into or pushed away from a gap, you've found a draught. Mark it with a pencil or sticky note for later sealing.
Combine for Maximum Impact: More Savings for Minimal Spend
Draught-proofing is a foundational step, but its effectiveness is amplified when combined with other low-cost, high-impact energy-saving measures. For just a little more effort and a minimal additional outlay, you can unlock significantly greater savings:
Comparison Table: Individual vs. Combined Savings
| Action | Estimated Savings (Annual) | Estimated Cost (Materials) | Key Benefit |
|---|---|---|---|
| Draught-proofing alone | £180 | £40 | Stops heat escaping directly |
| Thermostat Tune-up (1°C) | £100 | Free / £0 | Reduces overall heating demand |
| Radiator Reflectors | £20-£30 | £10 | Directs heat into room, not wall |
| Combined Total | £280-£310 | ~£50-£60 | Holistic approach for optimal heat retention |
← Swipe to see more →
- Thermostat Tune-up: Reducing your thermostat by just 1°C can save you around £100 per year, according to the Energy Saving Trust. Most homes are perfectly comfortable at 19-20°C during the day.
- Radiator Reflectors: These foil-backed panels slot behind radiators on exterior walls. For less than £10, they reflect heat back into the room instead of it being absorbed by the cold wall, saving an extra £20-£30 annually.
By investing roughly £50-£60 in materials and a few hours of your time, you could achieve annual savings of around £280-£310, significantly cushioning the blow of rising energy costs. This isn't just about saving money; it's about making your home a more comfortable, warmer, and more energy-efficient place to live, a critical step towards a greener, more sustainable UK.
FAQ
Q1: Will draught-proofing affect my indoor air quality? A1: When done correctly, draught-proofing should not negatively impact your indoor air quality. It’s about sealing uncontrolled air leaks, not blocking necessary ventilation (like trickle vents, extractor fans, or appliance vents). Excessive sealing without adequate ventilation can lead to issues, but by following the "What NOT to seal" guidelines, you'll avoid this.
Q2: How long does draught-proofing last? A2: The longevity varies. Self-adhesive foam strips might need replacing every 2-5 years as they can degrade or lose their stickiness. Silicone and acrylic sealants can last 10-20 years if applied well. Door snakes are durable indefinitely. Regular checks (e.g., annually before winter) are recommended to ensure seals remain effective.
Q3: Can I do this myself, or do I need a professional? A3: The vast majority of draught-proofing tasks described are simple DIY projects requiring basic tools (knife, scissors, sealant gun) and minimal skill. The key is patience and attention to detail. For complex issues, like major structural gaps or specific concerns about ventilation for gas appliances, consulting a professional builder or Gas Safe engineer is advisable.
Q4: Is it better to draught-proof before or after insulating my home? A4: Draught-proofing should ideally be one of the first steps in insulating your home. It's often referred to as 'low-hanging fruit' due to its high impact and low cost. There's little point in paying for expensive loft or wall insulation if heat is just escaping through unsealed gaps. Address draughts first to maximise the efficiency of any subsequent insulation efforts.
Q5: My home is listed/in a conservation area. Are there restrictions on draught-proofing? A5: Yes, there can be. If your home is listed or in a conservation area, you may need permission from your local planning authority for external alterations or changes that affect the character of the building. Internal draught-proofing like sealing around doors, windows (without replacing them), or loft hatches is usually fine, but always check with your local council's planning department first if you are unsure, especially for things like new draught excluders on main doors or sealing around original sash windows.
Q6: What's the best time of year to draught-proof? A6: Any time of year is suitable, but you'll notice the benefits immediately if you do it as autumn approaches. However, the incense stick test is most effective on a windy day, which can happen any season. Avoid attempting sealant work in very cold or wet conditions if the product instructions recommend otherwise.
Recommended energy saving products
Independently chosen kit that helps UK households cut energy use.

Tapo P110 Smart Plug (Energy Monitoring)
See exactly which appliances are quietly inflating your bill — track real-time watts, kWh and runtime from your phone.
- Real-time energy monitoring
- Cuts standby/vampire power
- Schedule appliances off-peak
Estimated benefit: ~£40/yr standby savings
Shop on Amazon
Home Energy Monitor (Whole-House)
Track your whole-home electricity use live and find where the kWh are going before the bill lands.
- Whole-house live usage
- Spot expensive habits fast
- App history & alerts
Estimated benefit: Awareness cuts ~5-10% use
Shop on Amazon
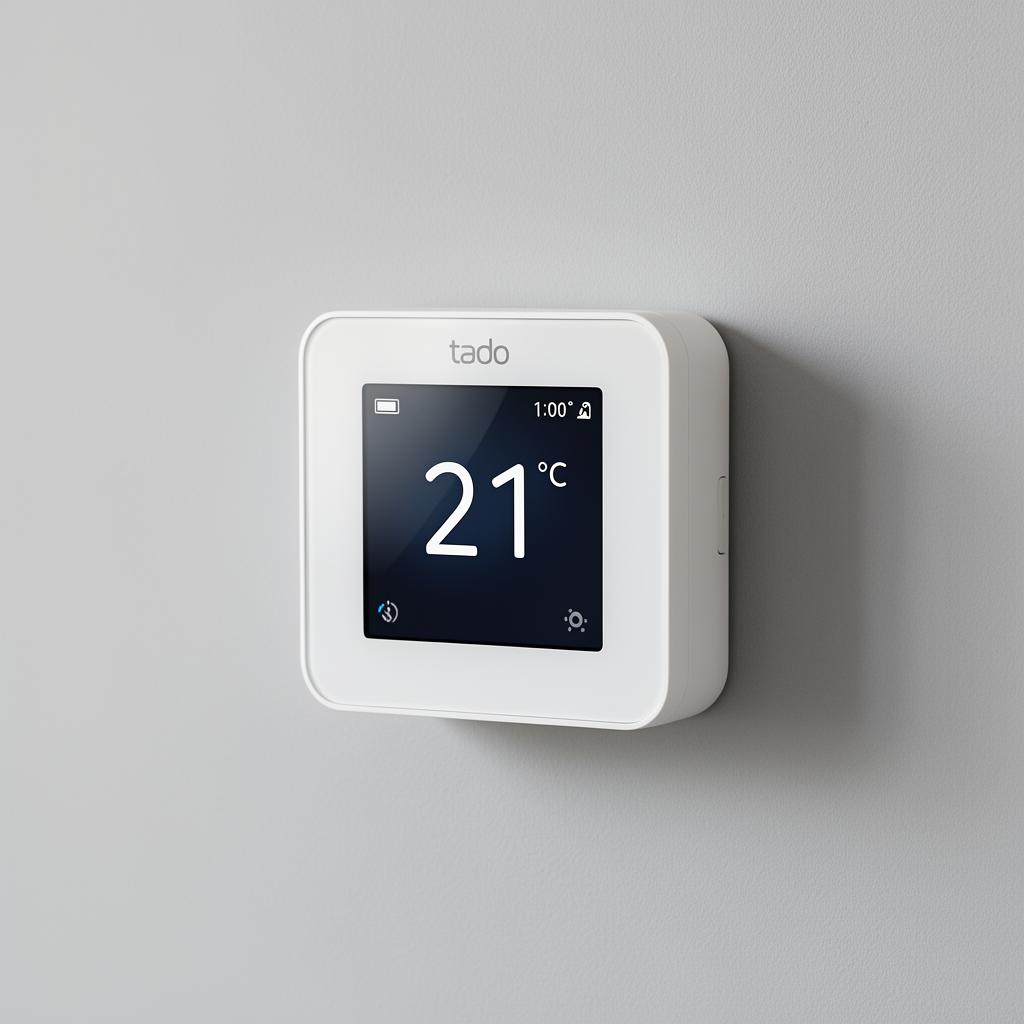
tado Smart Thermostat Starter Kit
Schedule, zone and remote-control your heating — independently shown to cut heating bills meaningfully.
- Heat only when needed
- Geofencing & schedules
- Room-by-room control
Estimated benefit: Up to ~£140/yr
Shop on AmazonAffiliate links — we may earn a small commission at no extra cost to you. This keeps Power Guardian free and independent.
Conclusion: A Small Investment for Significant UK Energy Resilience
The message from Power Guardian UK is clear: in an era of unpredictable energy prices and increasing focus on home efficiency, draught-proofing remains the bedrock of a smart energy strategy. For a modest outlay of around £40-£60 and a few hours of your time, you can secure annual savings that far outstrip the initial investment, year after year.
This isn't just theory; it's tangible, UK-specific data translating into real-world pennies saved on your gas bill, keeping hundreds of pounds in your pocket annually based on the Ofgem price cap. Beyond the financial incentive, a draught-free home is a more comfortable, warmer space, reducing the need for excessive heating and contributing directly to the UK's net-zero ambitions.
So, grab your sealant gun, a roll of foam tape, and that incense stick. Winter is coming, but your bank account doesn't have to freeze with it. Draught-proofing isn't just an upgrade; it's a fundamental act of financial and environmental responsibility that every UK homeowner in 2026 should embrace.
How much can draught-proofing save me on my energy bills annually?
You could save approximately £180 per year on your heating bill. This is based on an average material cost of under £40 and typical energy prices in 2026, creating an excellent return on investment.
What percentage of heat can I lose through draughts in an older home?
Older UK properties built before 2000 can lose a significant 15–20% of their generated heat directly through unwanted gaps and cracks. This heat loss translates directly into higher energy bills.
What are the most common places draughts hide in a UK home?
The article highlights letterboxes, front and back doors (especially around frames and under the door), unsealed loft hatches, and gaps in suspended timber floors (skirting boards and floorboards) as common culprits.
What's an example of a simple, cost-effective fix mentioned in the article?
A brush seal for your letterbox is a simple and effective fix, costing around £6-£10. This prevents cold air, especially in windy regions, from channelling directly into your hallway.
How much can I expect to spend on materials for basic draught-proofing measures?
For an average material cost of under £40, you can implement significant draught-proofing measures. Specific fixes like door seals, foam strips, and keyhole covers typically range from £2-£25 per item.
Recommended kit
tado Smart Thermostat X
Schedule, zone and remote-control your heating — independently shown to cut heating bills by up to 28%.
Shop on Amazon